 Subaru Forester: Programming the transmitters
The keyless entry system is equipped with a special code learning feature that allows you to program new transmitter codes into the system or to delete old ones. The system can learn up to four unique transmitter codes. The four transmitter codes may be the same or different.
Programming transmitter codes into system:
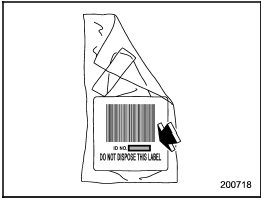
Bag containing transmitter
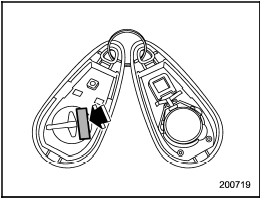
Transmitter circuit board
To register a new transmitter with the
keyless entry system, it is necessary to
program the transmitter’s code (identification
number) into the system. A label
showing the code is affixed to the bag
containing the transmitter, and another is
affixed to the circuit board inside the
transmitter. If there is no bag, open the
transmitter case and make a note of the
eight-digit number. Program the number
into the system in accordance with the
following procedure:
1. Firmly close the doors and the rear
gate.
2. Open the driver’s door, sit on the driver’s seat, and close the door.
3. Perform the following steps within 45 seconds.
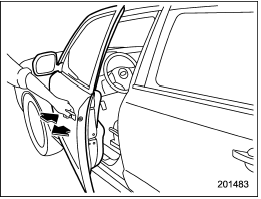
(1) Open and close the driver’s door once.
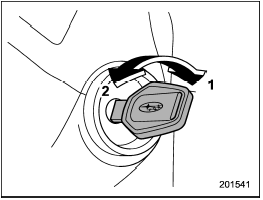
1) ON
2) LOCK
(2) Insert the key into the ignition switch, then turn it from the “LOCK” position to the “ON” position 10 times within 15 seconds.
NOTE
- When you complete step (2), an
electronic tone will sound once.
- If you do not perform steps (1) and (2) within 45 seconds, an error will occur. Neither an electronic tone nor the buzzer will sound, and the interior lamp will not flash. In this event, perform the whole procedure again beginning with part 1.
4. Open and close the door once within 15 seconds.
NOTE
- When part 4 of the procedure is
completed, an electronic tone will
sound for 30 seconds.
- If you do not perform the operations in part 4 within 15 seconds, an error will occur and the electronic tone will not sound. In this event, perform the registration steps again beginning with part 3 of the procedure.
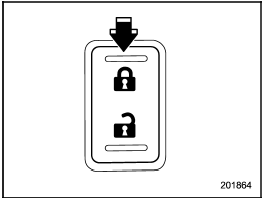
5. Before the electronic tone stops sounding, push the lock side of the power door lock switch the same number of times as the leftmost digit of the transmitter code. For example, push the lock switch eight times if the leftmost digit of the code is 8.
NOTE
- The electronic tone will stop sounding
when you start entering the number.
- If you do not start entering the number using the lock switch before the electronic tone stops sounding, an error will occur. In this event, perform the registration steps again beginning with part 3 of the procedure.
- If the interval between one push of the switch and the next exceeds 5 seconds, an error will occur. In this event, perform the procedure again beginning with part 4. If an error occurs six times, perform the procedure again starting with part 3.
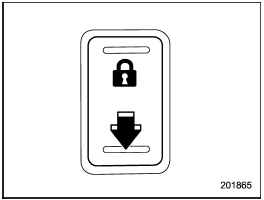
6. When you have finished entering the number, push the unlock side of the lock switch within 5 seconds.
NOTE
- An electronic tone will sound.
- If you push the unlock side of the lock switch when more than 5 seconds have passed, an error will occur. In this event, perform the procedure again beginning with part 4. If an error occurs six times, perform the procedure again starting with part 3.
7. Perform parts 5 and 6 of the procedure for each of the remaining digits of the transmitter code beginning with the second digit (counting from the left) and finishing with the eighth digit.
NOTE
- When you finish entering the eighth
digit, an electronic tone will sound for
30 seconds.
- If the interval between one push of the switch and the next exceeds 5 seconds, an error will occur. In this event, perform the procedure again beginning with part 4. If an error occurs six times, perform the procedure again starting with part 3.
8. Before the electronic tone stops sounding, use the power door lock switch to reenter the transmitter code beginning with the leftmost digit.
NOTE
If you do not start entering the number
using the lock switch before the electronic
tone stops sounding, an error
will occur. In this event, perform the
procedure again beginning with part 3.
9. When you have finished entering the code a second time, an electronic tone will sound for 1 second and automatic door locking and unlocking operation will take place once to indicate completion of registration, provided the code entered the second time is identical to that entered the first time.
NOTE
If the code entered the second time is
not identical to the code entered the
first time, an error will occur. In this
event, perform the procedure again
beginning with part 5. If an error occurs
five times, perform the procedure again
starting with part 3.
10. If you wish to program another transmitter code into the system (up to four transmitter codes can be programmed into the system), perform the procedure beginning with part 4. When you have finished programming all of the necessary transmitter codes into the system, remove the key from the ignition switch.
11. Test every registered transmitter to confirm correct operation.
 Replacing lost transmitters
If you lose a transmitter or want to
purchase additional transmitters (up to
four can be programmed), you should reprogram
all of your transmitters for security
reasons. It is recommended that ...
 Deleting old transmitter codes
The control unit of the keyless entry
system has four memory locations to store
transmitter codes, giving it the ability to
operate with up to four transmitters. When
you lose a transmitter, t ...
See also:
Carpet and mats
Marks or stains can be removed by gentle
scrubbing with a weak solution of soap and
warm water.
For more stubborn stains a commercially
available carpet cleaner should be used. ...
Hazard warning flasher
Hazard warning flasher
The hazard warning flasher is used to
warn other drivers when you have to park
your vehicle under emergency conditions.
The hazard warning flasher works regardless
of ...
Steel cargo grid
Your vehicle can be equipped with a steel grid
that helps prevent objects in the cargo area
from moving forward into the passenger compartment. ...
