 Volvo XC60: Checking and adding oil

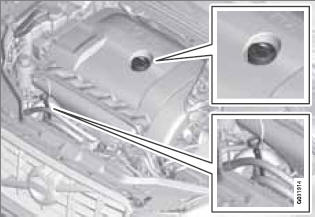
Location of the filler cap and dipstick

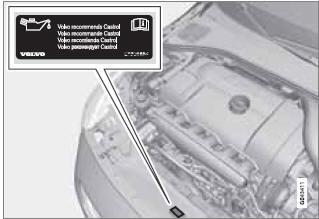
Volvo recommends Castrol oil products
NOTE
Before checking the oil:
• The car should be parked on a level surface.
• If the engine is warm, wait for at least
10 – 15 minutes after the engine has
been switched off.

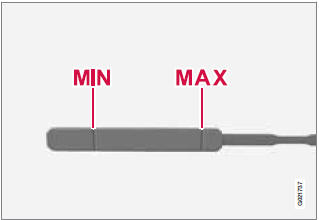
The oil level must be between the MIN and MAX marks on the dipstick
Checking the oil
1. Pull out the dipstick and wipe it with a lintfree rag.
2. Reinsert the dipstick, pull it out, and check the oil level. The level must be between the MIN and MAX marks.
3. Add oil if necessary. If the level is close to the MIN mark, add approximately 0.5 US quarts (0.5 liters) of oil.
4. Recheck the level and add more oil if necessary until the level is near the MAX mark.
WARNING
Do not allow oil to spill onto or come into
contact with hot exhaust pipe surfaces.
NOTE
Synthetic oil is not used when the oil is
changed at the normal maintenance intervals
except at owner request and at additional
charge. Please consult your Volvo
retailer.
 Checking the engine oil
The oil level should be checked at regular intervals,
particularly during the period up to the
first scheduled maintenance service.
• See page 356 for oil specifications.
• Refer to the Warr ...
 Fluids
...
See also:
Review: 2024 Mercedes-Benz C and GLC: Distinct Appearances, Shared Performance
The 2024 Mercedes-Benz C-Class and GLC-Class, though visually distinct, share a common platform, offering compelling options in the luxury market. While the C-Class presents itself as a sedan, the G ...
Switching the display
Press .
Track title, Artist name and Album title (MP3 only) are shown on the display.
To return to the previous display, press
or
(BACK).
■Error messages
“CD CHECK”: This indicates a ...
Cargo compartment enlargement
Important safety notes
WARNING
Always lock the seat backrest in its upright position when the rear seat bench
is occupied, or the extended cargo volume is not in use.
Check for secure lockin ...
