 Suzuki Grand Vitara: Bulb Replacement
 WARNING:
• Light bulbs can be hot enough to burn your finger right after being turned off.
This is true especially for halogen headlight bulbs. Replace the bulbs after they
become cool enough.
• The headlight bulbs are filled with pressurized halogen gas. They can burst and
injure you if they are hit or dropped. Handle them carefully.
CAUTION: The oils from your skin may cause a halogen bulb to overheat and burst when the lights are on. Grasp a new bulb with a clean cloth.
CAUTION: Frequent replacement of a bulb indicates the need for an inspection of the electrical system. This should be carried out by your SUZUKI dealer.
NOTE: If it is difficult to replace headlight bulbs or clearance light bulbs due to under-hood components trust this job to your dealer.
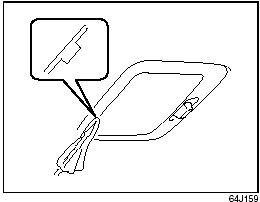
Center Interior
Light (if equipped)
Pull down the lens by using a plain screw driver covered with a soft cloth as shown. To install it, simply push it back in. The bulb can be removed by simply pulling it out. When replacing the bulb, make sure that the contact springs are holding the bulb securely.
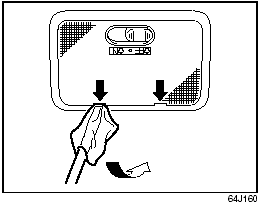
Rear Interior
Light (if equipped)
Pull down the lens by using a plain screw driver covered with a soft cloth as shown. To install it, simply push it back in. The bulb can be removed by simply pulling it out.
Spot Light (if equipped)
Pull down the lens by using a plain screw driver covered with a soft cloth as shown.
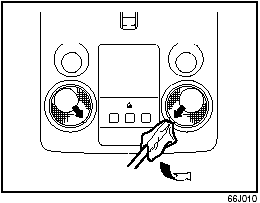
Ceiling-mount
type (if equipped)
Remove the bulb holder by turning it counterclockwise. Pull out the bulb.
Headlights
Low beam
(Halogen headlamp)
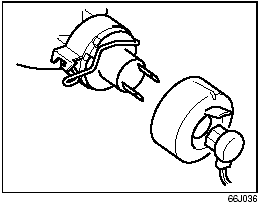
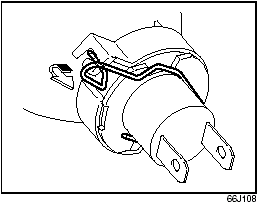
Open the engine hood. Disconnect the coupler. Remove the sealing rubber. Push the retaining spring forward and unhook it. Then remove the bulb. Install a new bulb in the reverse order of removal.
High beam
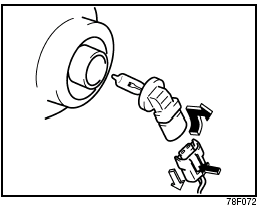
Open the engine hood. Disconnect the coupler while pushing the lock release. Turn the bulb holder counterclockwise to remove it.
Front Fog Light
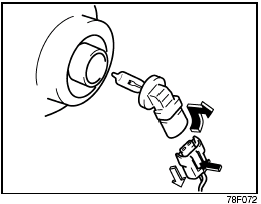
Open the engine hood. Disconnect the coupler while pushing the lock release. Turn the bulb holder counterclockwise to remove it.
Other General Lights
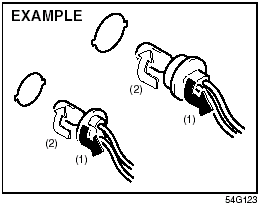
Bulb holder
(1) Removal (2) Installation
To remove a bulb holder from a light housing, turn the holder counterclockwise and pull it out. To install the holder, push the holder in and turn it clockwise.
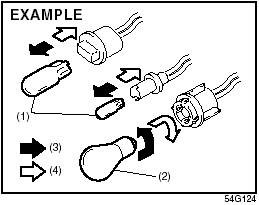
Bulb (3)
Removal (4) Installation
There are two types of bulb, “Full glass type” (1) and “Glass/metal type” (2). To remove and install a full glass type bulb (1), simply pull out or push in the bulb. To remove a glass metal type bulb (2) from a bulb holder, push in the bulb and turn it counterclockwise. To install a new bulb, push it in and turn it clockwise. You can access the individual bulb or bulb holders as follows.
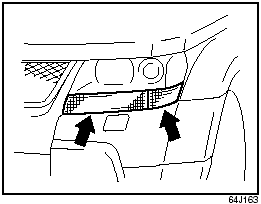
Parking/Turn
signal light
Trust this replacement job to your dealer as the front grille and the headlight housing must be removed for this job.
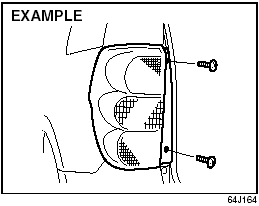
Rear combination
light
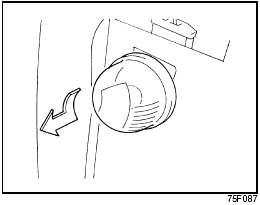
License plate
light
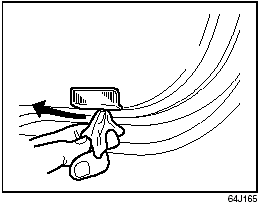
Door illumination
light
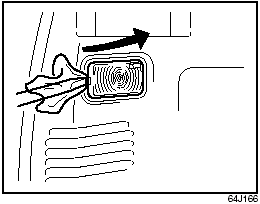
Luggage compartment
light
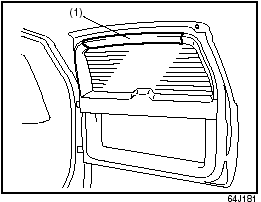
High-mount stop
light (if equipped)
To remove a high-mounted stop light housing the following procedure: 1) Open the tailgate, and remove the trim (1) as shown in the illustration.
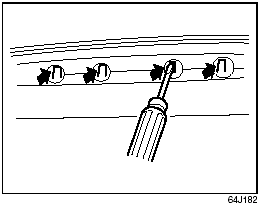
2) Release the claws of the light housing by the flat head etc. through the service holes as shown in the illustration.
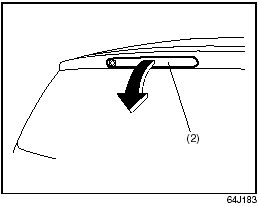
3) Close the tailgate. Remove a highmounted stop light housing (2) from the tailgate.
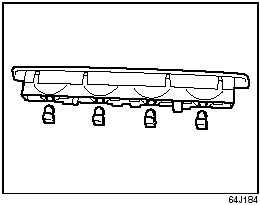
4) Remove the each bulb. 5) Replace the bulbs. To install a high-mounted stop light housing in the reverse order of removal.
 Headlight Aiming
Since special procedures are required, we recommend you take your vehicle to
your SUZUKI dealer for headlight alignment. ...
 Wiper Blades
Wiper Blades
If the wiper blades become brittle or damaged, or make streaks when wiping, replace
the wiper blades. To install new wiper blades, follow the procedures below.
CAUTION: To avoid scra ...
See also:
Disarming the system
Briefly press the “”
button (for less than
2 seconds) on the remote transmitter. The
driver’s door will unlock, an electronic
chirp will sound twice, the turn signal
lights will flash ...
Engine Oil Selection
For best performance and maximum protection under all
types of operating conditions, the manufacturer recommends
engine oils that are API Certified and meet the
requirements of Chrysler Material ...
Gate Operator/Canadian Programming
Canadian radio-frequency laws require transmitter
signals to “time-out” (or quit) after several
seconds of transmission – which may not
be long enough for HomeLink to pick up the
signal ...
